The whole process of website transferring from one place to another passes through 4 stages:
- File transfer of a website
- Table transfer from the database
- Connection of one to another
- Setting of domain name
You get installed and functioning slider with tables after creating a new website on our hosting. If you transfer a website, you need to replace it with yours.
File transfer
Here there are many different ways but I personally prefer to enter your new hosting, to connect it to the old one through SFTP and just to copy files as they are. Before this, of course, you have to save the existing config (do not add any other information) and delete the files from the current website.
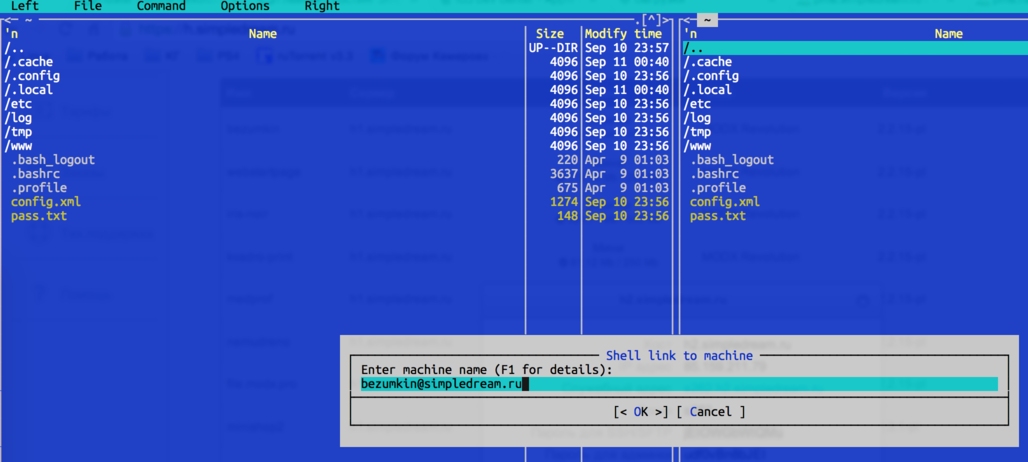
You can get the information how to enter our hosting clicking the icon i on the table line.
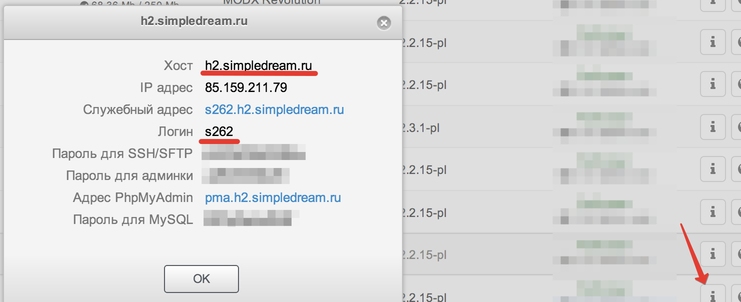 Here we need a login and a host
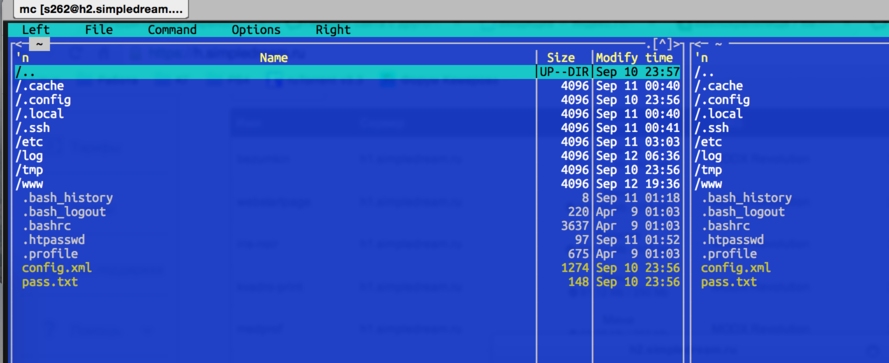
Now get connected from the console of your computer (Mac OS X, GNU\Linux) or from Putty terminal (Windows)
ssh yourlogin@hostIn our example it will be:
ssh s262@h2.simpledream.ruOpen Midnight Commander:
mcAnd we see the clear two-panel manager:
Now we have to jump to www directory and save the config of the current website with your paths and passwords for database on our hosting.
It is easy – transfer config.inc.php to the website root:
mv ./core/config/config.inc.php ./config.inc.phpNow you need to delete all files from the website except for the transferred config:
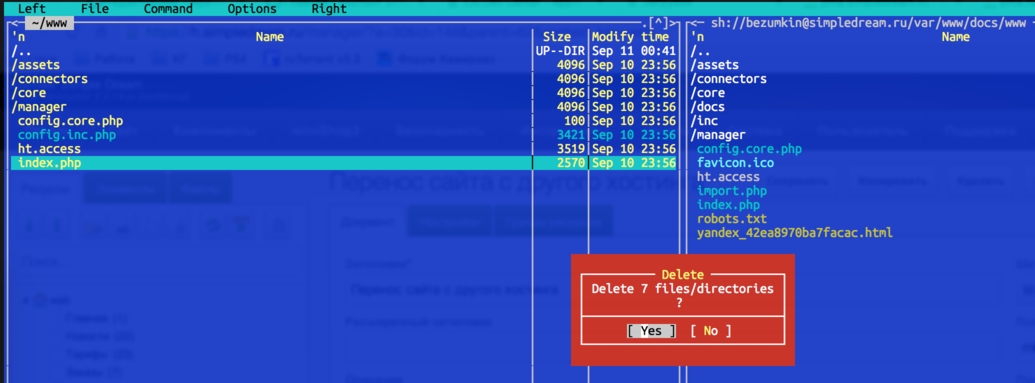
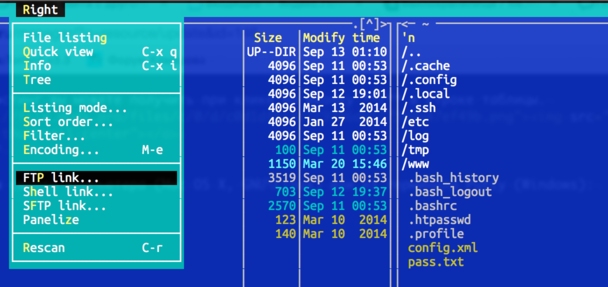
Then there is the most interesting – you should connect to your old hosting through FTP or SFTP and copy your website to our hosting. For this jump to the second panel of the manager (tab), press F9 and select the appropriate connection mode (it is already dependent on your old hosting).
When you get connected successfully, copy all the files of your website.
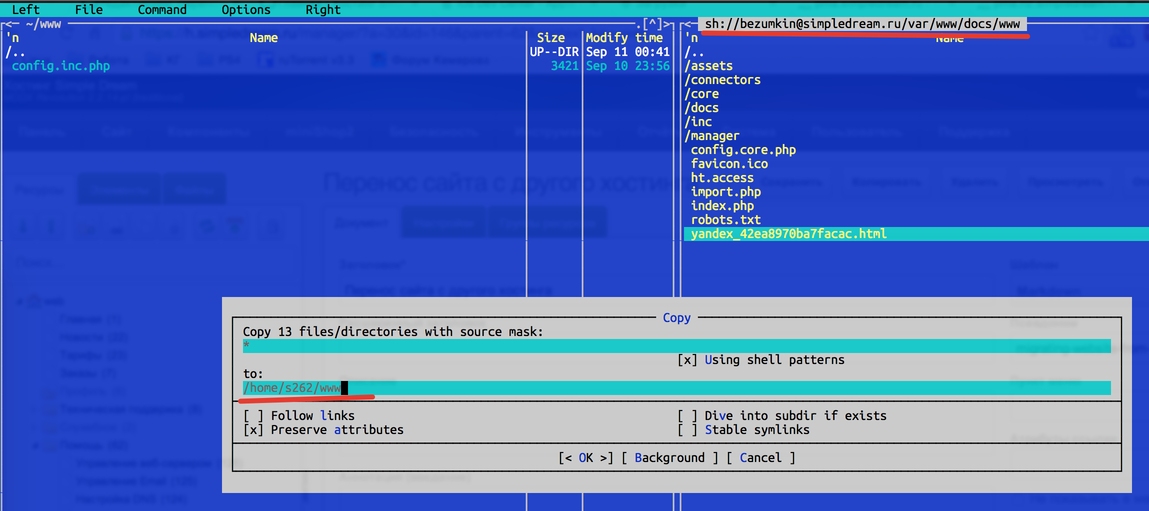 Of course, there should be enough space for this operation on your tariff
You just need to return the configuration file back:
mv ./config.inc.php ./core/config/config.inc.phpThe permissions for files and directories are transferred together with them, that is why it is better to correct them:
chmod -R go=rX,u=rwX ~/www/In all the examples s262 must be changed for the login of your website
Database transfer
All work here can go not only through consoles, but though phpMyAdmin as well.
First, you have to rollout database from your old host. Enter phpMyAdmin and make a dump. It is desirable to indicate compression to download less.
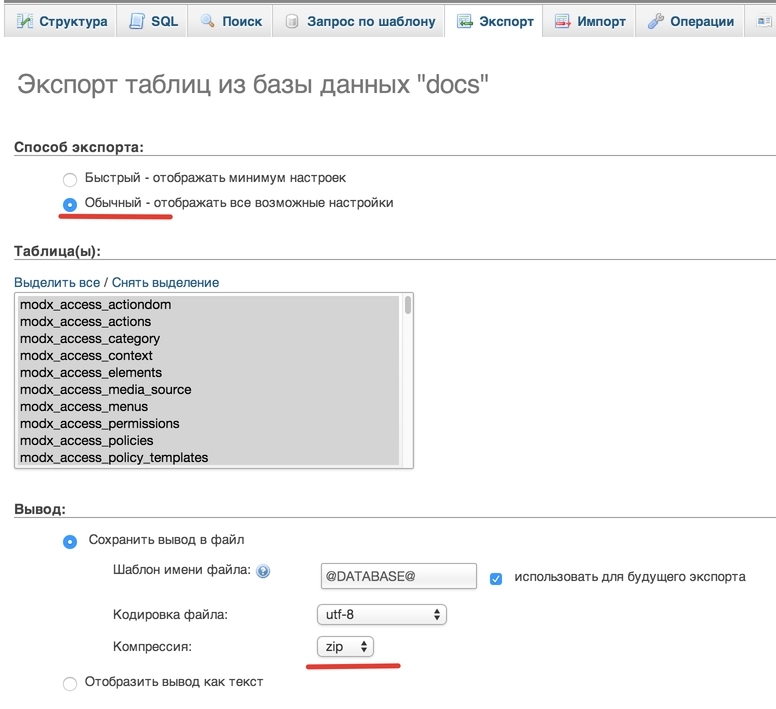 If rollout with compression doesn’t work (it often happens when database is large), roll-out without compression.
Then enter our hosting (address phpMyAdmin you can see in the window with information) and import the dump.
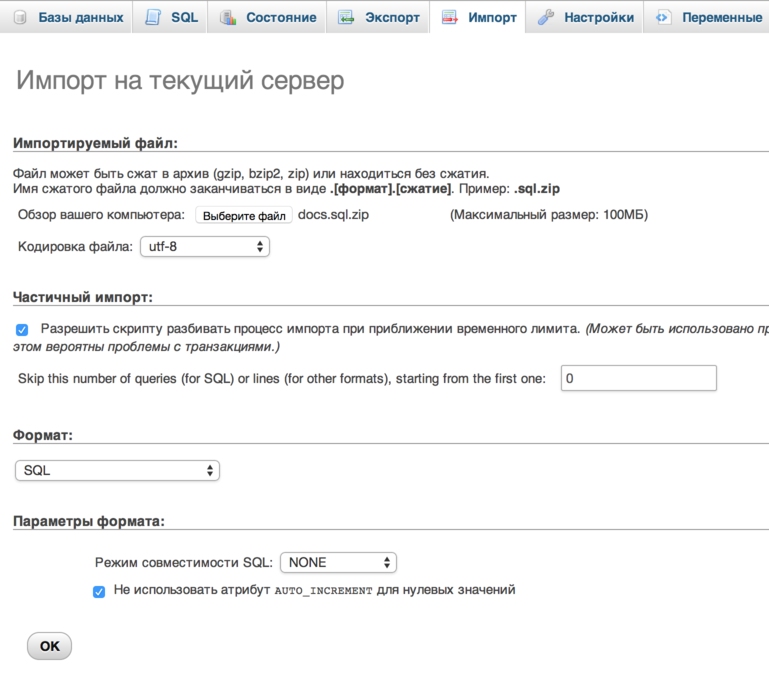
Attention! If for some reason the dump doesn’t get downloaded (you see the white window or the error), download it though SFTP to your directory and import it from the server console manually.
mysql -h 127.0.0.1 -u yourlogin database -p < yourfile.sqlFor example:
mysql -h 127.0.0.1 -u s262 s262 -p < myfile.sqlThe command will ask for your MySQL password – enter it.
There is one more path not to transfer all tables at once, but by turn – you can select them during the transfer.
Connection on files and database
We have almost accomplished this work when we saved config.inc.php at the first part
You need to specify that the connection with MySQL goes through 127.0.0.1 ip and 3306 port, but not the local socket.
Because all websites operate in the secure environment and there are no sockets there, only tcp ports.
Pay attention that if somewhere in a config there is localhost - it is an access to the socket.
That is localhost should be replaced by 127.0.0.1.
Now you need to correct the paths in 3 files:
www/config.core.phpwww/manager/config.core.phpwww/connectors/config.core.php
There is a variable with the information where the website core is. You need to replace it for:
/home/yourlogin/www/core/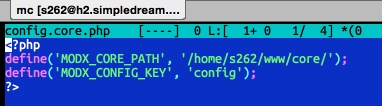
If you have a standard table prefix, so you do not need to do anything, just update your website through the control panel and the path will be written by itself.
Now your website can be opened through the service name yourlogin.yourhost.modhost.pro and in our example it is s262.h2.modhost.pro.
Setting of a domain name
Now you just need to indicate new hosting ip for your domain name.
It depends on how the domain is controlled but in you can read the general information on the next page
Then you have to add your domain to the website settings to inform the hosting that it should respond to it.
And you can also adapt the redirect in your server rules, from the service name to the operating one, write it in webserver settings:
if ($host != 'yourdomain.com') {
    return 301 http://yourdomain.com;
}
Details are on the next page.